Art Lab is a recurring program focusing on STEAM (science, technology, engineering, art and math), with a focus on art. It is held at 7 p.m. every Monday. The first and third Mondays of the month are planned lessons, and the second and fourth Mondays are open draw sessions for students to relax and meet other artists.
The information below focuses on the Art Lab lesson: Electric Painting, in which the students made an interactive sound device using paint.
Advanced Planning
My main goal for this project was to engage teens in STEAM. I wanted students to explore the touch board technology, familiarize themselves with concepts of conductivity and practice creative problem solving through visualization.
Planning began as early as two months in advance. This allowed time for preparation of materials, marketing, creation of a lesson plan, etc. To ensure you're prepared for the program, you'll need to:
- Purchase an electric paint touch board kit (such as the kit we bought from Bare Conductive)
- Check that all kit materials are working properly; we found that the Micro SD Card Adapter that came with the kit did not work
- Decide what type of project will be done with the touch board
- Possibly pre-download sounds/recorded audio, save them to a file or even program them to the touch board to save time
- Ensure the touch board, portable speaker and laptop are charged
- Prepare a demonstration
- Cover the workspace tables with paper
The main challenge I faced was narrowing down the project, as there are a multitude of ways to utilize the touch board. For the project to work for Art Lab, I needed it to be complete in one hour, to accommodate a group of 10 students, and to incorporate aspects of STEAM.
With the time it takes to paint, let the paint dry and upload MP3 tracks, there wasn't enough time for students to do this all in one sitting. I decided we should focus on the image making and conductive painting aspect of the project. With this in mind, I downloaded an MP3 track to each of the 12 electrodes on the touch board in advance of the program.
Marketing
Allen County Public Library (ACPL) has an event calendar, as well as a print magazine called "What's Happening" that lists upcoming events featured at all of the library's locations. Internally, we are asked to have our program information submitted to the event calendar two months in advance to make it into the publication. From there, our fantastic graphic designer creates what is requested.
In my case, I asked for four large posters and about 200 small fliers. As soon as the fliers were posted, we had people inquiring about Art Lab and registering in advance. Since this particular program was gaining interest and a following, I was able to market the event to students who were attending other Art Lab events.
In addition, I included links to tutorials and videos on Bare Conductive's website in the ACPL public calendar. This helped to give customers a better idea of the technology they would be working with.
Budgeting
I spent $145 (plus shipping) on the Bare Conductive kit, which we bought straight from the website. We also spent $2.50 on a large foam poster board and some additional money on snacks for the students.
Day-of-event Activity
On the day of the event, we set out the following materials:
- Paper on tables
- Water cups
- Paint brushes
- Paper towels
- Charged laptop, speaker and touch board (away from the painting materials)
Only one staff member was needed for the program. However, it would be beneficial to have two staff members present. This would allow you to split up the program assignments so one group works on painting the image and another on the programming.
Program Execution
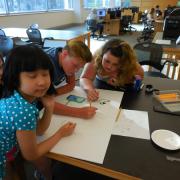
For the layout of the project, I chose to pre-download MP3 tracks to the 12 electrodes and have each student draw a correlating image to the electrode they chose. It made for a sort of random, yet very interesting, final product.
The students loved the way the conductive paint worked with the technology. Some of them came back within the week to play and explore with the installation, even explaining the process to their friends and family. A few students seemed more interested in the technology than the painting, although some enjoyed the painting just as well.
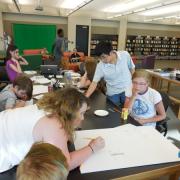
One lesson learned: We had 10 people working on one touch board, which was not ideal. It made for lulls that caused a couple students to lose focus. I tried to engage those students by having them draw sketches for the MP3 track they were assigned. I also delved into the technical side of things with the students who were interested.
Advice
The touch board provides various functions, which makes it a great programming tool. Bare Conductive offers a plethora of tutorials and instructions for different ways to program and utilize the touch board. You can find these on their website or by simply searching YouTube.
The conductive paint has a shelf life, so make sure you use it before it expires.
Also, be prepared to document your program with high-quality photos or videos since Bare Conductive encourages educators to submit their program to the website to share with others.
I also suggest allowing adequate time for the students to work and experiment with the final product. Unfortunately, there was not enough time for all the students to the see the final project working when we did it. I would plan to allot at least two hours for the program.
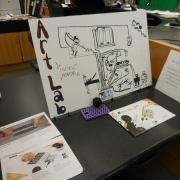
Finally, turning the finished product (if there is one) into an interactive installation in your department will extend the value gained from the program. Teens who were unable to attend got a chance to acquaint themselves with the technology, ask questions and become interested for the next program featuring the touch board. The teens who were a part of the program also felt a sense of pride seeing others explore and learn from what they created! Additionally, displaying the touch board as an installation encourages exploration, creation and collaboration between students, teachers and community by merging different aspects of STEAM to create a positive learning environment.
Supporting Materials
- Feedback (Coming Soon!)
- Programming Librarian Facebook Group

