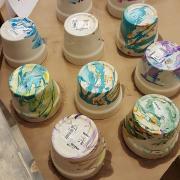
This program uses nail polish to turn terra cotta pots into unique art pieces; it is easy and fun for all ages. To keep costs down, we worked with the community to gather donations of the necessary materials.
Advanced Planning
Our goals were to show how colors come together, demonstrate surface tension and create a unique art piece for people's gardens. We began planning about three months in advance.
The key to nail polish "painting" is simple. You just need a lot of nail polish, which can get expensive. To cut down on costs, we sent out emails, created fliers and posted on social media asking people to donate their old or ugly polish. The only kind of nail polish that we didn't accept was gel; this type of polish won't work correctly since it flakes off when the pots dry.
To further cut down on costs, you could also ask people to donate ceramic items that are finished but not colorful. (You want the nail polish to pop.) For example, this project could also be done on cups and plates.
Marketing
We used our local newspapers and our library's Facebook, website and newsletter to market the program.
Budgeting
Our only cost for the program was purchasing the pots, which we bought from IKEA at about 50 cents apiece. The remaining supplies were either donated or were things we already had on hand. In total, we spent $10 on the program.
Day-of-event Activity
We only had one staff member (me) running this. You will need to do this outside or in a very well ventilated room because the fumes from the nail polish are strong.
The day of the event, prepare the supplies you will need: nail polish, pots, newspapers and a bowl of warm water. Our set-up included moving a table outside, covering it with newspapers and setting out the supplies. If it's windy you will need to anchor down your newspapers.
Program Execution
Fill a large- to medium-sized bowl with very warm water (not boiling). When filling the bowl, don't fill it all the way to the top with water. You will need enough room to dip the pots without causing water to spill out.
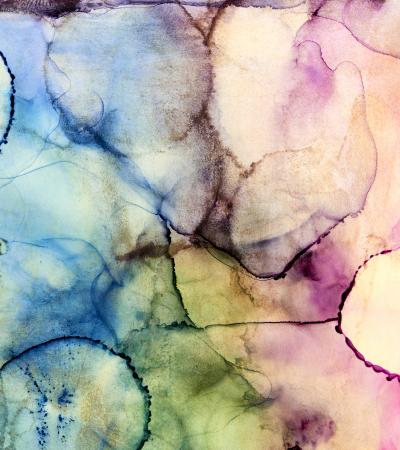
Pick a couple of nail polish colors (we suggest using one or two, unless you are also using a clear with sparkles) to use on your pot. Take one of the colors and drizzle the polish into the water. Keep your hand as close to the water as possible; your goal is to create zig-zag lines rather than dots in the water. If your hand is too high, you will break the surface tension and the nail polish won't float on the water.
Once you're satisfied with your first color's lines, do the same thing in a different direction with the next shade. Once done, take your pot and dip it into the mixture at a nearly 90 degree angle, twisting it to pick up as much of the nail polish as possible. You will have to dip the pot twice to cover the entire surface. Set pots upside down to dry before applying another coat of polish.
We had about 35 people the first time we did this at a women's expo in April, and everyone loved it! Many people planned to do this with their grandchildren, Girl Scout troop or 4-H. This program does not take long and leaves time for you to talk about the science of water.
We had everyone fill out surveys and were surprised at how many people would prefer to just pick the nail polish out and have you do it.
Advice
Do not do this inside! I did this inside the library as a demo to see how it worked and the results were not good for us! The smell tends to linger for a long time. Be sure your patrons take these with them once they're dry. They do dry quickly, so you will be able to do this again and again. It's especially fun in the summer when you can tie it in with gardening programs.
Supporting Materials
- Feedback (Coming Soon!)
- Programming Librarian Facebook Group


